embroidery placement guide
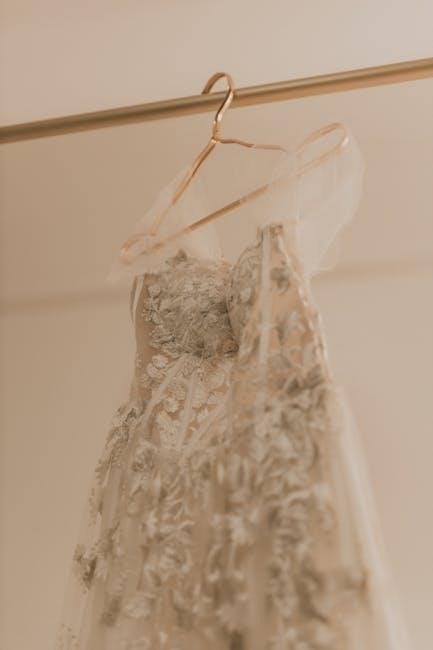
Mastering embroidery placement is essential for creating visually appealing and professional designs. Proper placement enhances both functionality and aesthetics, ensuring your embroidery stands out and aligns perfectly with the garment. Whether it’s a logo, pattern, or decorative element, understanding placement techniques leads to successful embroidery projects. This guide will walk you through the fundamentals, helping you achieve stunning results every time by combining creativity with practical guidelines.
Understanding Fabric Types and Their Impact on Embroidery
Fabric type significantly influences embroidery results. Stable fabrics like cotton and polyester work best, while loose weaves may distort designs. Choose fabric suited to your embroidery machine and design complexity for optimal outcomes.
Tools Needed for Accurate Placement
To achieve precise embroidery placement, essential tools include a measuring tape, ruler, and sewing hoop. A measuring tape helps mark the center of the fabric, ensuring symmetry. A ruler aligns designs with seams or pockets, maintaining balance. Stabilizing materials like interfacing or water-soluble toppings prevent fabric movement during stitching. A grid or template aids in visualizing the design’s position before embroidering. Optional tools like embroidery software or apps can help preview designs digitally. Proper use of these tools ensures accurate placement, enhancing the final embroidery outcome. Investing in quality tools simplifies the process and improves results, making embroidery more enjoyable and professional-looking. Always have these tools handy to achieve flawless placement every time. Accurate placement is the foundation of successful embroidery, so never overlook the importance of having the right tools. This ensures your designs look their absolute best.
Accurate measuring and marking are crucial for embroidery placement. Start by identifying the center of the fabric using a measuring tape or ruler. Fold the fabric in half vertically and horizontally to find the center point. Mark this spot with a pin or a small chalk dot. For designs aligned with seams or pockets, measure the distance from the edge to ensure proper alignment. Use a marking tool like a disappearing ink pen or tailor’s chalk to outline the design area. Double-check measurements to avoid placement errors. For intricate designs, create a grid on the fabric to guide stitching. Always test marking tools on scrap fabric to ensure they won’t damage the material. Precise measuring and marking techniques ensure your embroidery is perfectly positioned, enhancing the overall appearance of the finished piece. These steps form the basis of professional-looking embroidery. Selecting the appropriate design size is vital for embroidery placement. The size should complement the garment and the intended design, ensuring it is neither too small nor too large. Start by measuring the available space on the garment where the embroidery will go. Use a ruler or measuring tape to determine the maximum width and height. Consider the purpose of the embroidery—whether it’s for a logo, decorative element, or text. A design that is too small may be difficult to read, while one that is too large may overwhelm the garment. Scale the design according to the fabric type and the location on the garment. For example, a chest logo should be smaller than a back design. Use embroidery software to preview and adjust the size before stitching. Proper sizing ensures the design is balanced and visually appealing. Always test the size on scrap fabric to confirm it suits the garment. This step ensures professional-looking results and avoids costly mistakes. Understanding placement by garment type is crucial for balanced designs. Shirts, hats, and bags require specific positioning to enhance visibility and aesthetics. Measure and visualize to ensure a polished look. When embroidering shirts and tops, placement is key to achieving a professional and visually appealing result. The most common areas for embroidery are the chest, back, and sleeves. For chest placement, designs are typically centered and positioned between 3-5 inches below the neckline, depending on the garment size. On the back, larger designs can be centered and placed just below the collar or across the upper back. Sleeves often feature smaller designs or logos, aligned vertically or horizontally near the shoulder or cuff. Always measure the garment carefully to ensure proper alignment and proportions. Using a ruler or stabilizing tools can help achieve precise placement. Consider the design size relative to the garment to avoid overwhelming or underwhelming the piece. Proper placement enhances both functionality and aesthetics, making your embroidery stand out while maintaining a balanced look. Embroidery placement on hats and caps requires careful consideration to ensure designs are both visible and visually appealing. The front panel of the cap is the most common area for embroidery, typically centered and positioned 1-2 inches above the brim. Designs should be proportional to the cap size, avoiding excessive height or width that might overwhelm the space. For snapback or adjustable caps, ensure the design aligns with the closure. On fitted caps, consider the natural curve of the fabric to maintain a balanced look. Side embroidery, such as logos or text, should be aligned vertically and placed 1-2 inches from the seam. Back embroidery is less common but can feature smaller designs or text, centered and placed 1-2 inches below the closure. Always measure the cap carefully and use a template or stabilizing tools for precise placement. Proper alignment ensures a professional finish and enhances the overall design impact. Embroidery placement on bags and accessories requires attention to symmetry and visibility. For tote bags, backpacks, and similar items, the design should be centered on the front panel, typically 3-5 inches below the top seam. On smaller bags like pouches or drawstring bags, designs are often placed near the top edge or centered on the front, ensuring they remain visible when the bag is closed. For accessories like keychains or lanyards, embroidery should be small and discreet, placed on the widest part of the item. Avoid embroidering too close to seams, zippers, or handles, as this can distort the design. Use stabilizing tools like templates or grids to align patterns accurately, especially on irregularly shaped items. Proper placement enhances functionality and ensures the design remains a focal point, making the accessory both stylish and professional-looking; Always measure carefully to achieve a balanced and visually appealing result.
Hooping and stabilizing are critical for precise embroidery, ensuring designs align perfectly and fabric remains taut. Use the right hoop size and stabilizer type for your fabric to prevent distortion and achieve crisp stitches. Proper tension and material support are key to professional-looking results. Always match stabilizers to fabric weight and embroidery complexity for optimal outcomes. This ensures smooth stitching and accurate placement. Stabilizing materials like cut-away, tear-away, or water-soluble options help maintain fabric stability. Hooping correctly prevents fabric movement during embroidery, crucial for intricate designs. Use additional tools like clips or adhesive for bulky items. Regularly check hoop tension to avoid embroidery errors. Proper hooping and stabilizing techniques are foundational for achieving high-quality embroidery. They ensure designs are sharp and well-aligned, making your projects stand out. Always test stabilizers on scrap fabric before embroidering to ensure compatibility. This step ensures the best results and avoids costly mistakes. By mastering hooping and stabilizing, you can tackle even the most complex embroidery projects with confidence. The right techniques and materials make all the difference in achieving professional-looking embroidery. Always invest time in proper preparation for optimal results. Centering designs on fabric is a fundamental step in embroidery placement, ensuring your design looks balanced and visually appealing. To achieve this, measure the fabric and design dimensions carefully. Use a ruler or measuring tape to find the fabric’s center point, marking it with a pencil or temporary marker. Align the design’s center with the fabric’s center mark, ensuring symmetry. For precise alignment, use a grid or template to guide placement. Double-check the positioning before embroidering to avoid mistakes. For large designs, divide the fabric and design into quadrants to ensure accuracy. Utilize hooping or stabilizing tools to keep the fabric taut, preventing movement during embroidery. Proper centering enhances the overall appearance of your embroidery, making it look professional and well-executed. Always take your time with this step, as accurate placement is key to achieving stunning results. Aligning embroidery designs with seams or pockets requires careful planning to ensure a cohesive and professional look; Start by identifying the garment’s seams or pocket locations, using measurements or visual guides. Transfer the design onto the fabric, ensuring it aligns perfectly with the seam or pocket edge. Use a ruler or alignment tool to achieve precise positioning. For pocket alignment, consider the pocket’s size and shape, placing the design symmetrically within or around it. When embroidering near seams, leave a small margin to avoid stitching through multiple layers. Stabilizing the fabric with hoop or adhesive backing helps maintain alignment during embroidery. Always preview the design placement on the garment before stitching to ensure accuracy. Proper alignment enhances the design’s visual appeal and ensures it complements the garment’s structure, creating a polished and professional finish. Avoiding common mistakes in embroidery placement is crucial for achieving professional results. One of the most frequent errors is improper measurement, leading to designs that are either too large or small for the garment. Always measure the target area accurately and use a template or stabilizing material to guide placement. Another mistake is ignoring fabric type; heavyweight fabrics like denim require different handling compared to lightweight materials like silk. Additionally, failing to center the design can make the embroidery look off-balance. To prevent this, use a centering tool or fold the fabric to find the midpoint. Lastly, not leaving enough space between the design and seams or edges can result in a cramped appearance. By carefully planning and double-checking each step, embroiderers can avoid these pitfalls and ensure their designs look polished and well-executed. Proper preparation and attention to detail are key to successful embroidery placement. For specific placements, consider the garment’s usage and design balance. Use templates for precise alignment, especially on curved areas like sleeves and collars. Proper stabilizing materials ensure durability and prevent distortion, while pre-washing fabrics helps avoid shrinkage issues. Always visualize the final look and adjust placements to complement the wearer’s body type. Testing on scrap fabric before embroidering the actual garment can save time and materials. Pay attention to symmetry and proportions to achieve a polished, professional finish. These tailored tips help embroiderers adapt their techniques to various fabrics and garment types, ensuring each design looks its best. By focusing on these details, embroiderers can create custom pieces that stand out for their quality and aesthetics. This approach enhances creativity while maintaining technical precision, making every project a success. When embroidering sleeves, placement is critical for both aesthetics and functionality. Designs should complement the natural curves of the arm and align with the garment’s overall style. For long sleeves, consider placing smaller designs near the wrist or upper arm, while larger designs can be centered vertically. Short sleeves offer a more compact canvas, so opt for balanced, symmetrical patterns. Always measure the sleeve’s width to ensure the design fits proportionally. Stabilizing the fabric is key to prevent stretching during embroidery. Use a hoop or stabilizing material to keep the sleeve taut, ensuring crisp stitches. For logos or text, align them horizontally, about 4-6 inches below the shoulder seam. Avoid overly intricate designs on thin fabrics, as they may distort. Test designs on scrap fabric first to ensure they look good on curved surfaces. Proper alignment and stabilization will make your sleeve embroidery stand out and last longer. Embroidery on collars requires careful placement to ensure a polished look. For flat collars, center the design horizontally, about 1-2 inches below the collar edge. On button-down collars, avoid placing designs over buttons to prevent damage. For polo collars, position the design slightly above the collar seam for a balanced appearance. Measure the collar width to ensure the design fits proportionally. Small designs, like names or logos, work well on collars, while larger designs may overwhelm the space. Use a smaller hoop to stabilize the fabric, and align the design with the collar’s edge for a professional finish. Test the design on scrap fabric first to ensure it looks good on curved surfaces. Proper alignment and stabilization will make your collar embroidery stand out and last longer. Always consider the collar type and design size for the best results. Mastering embroidery placement is a skill that elevates your projects from ordinary to extraordinary. By understanding fabric types, measuring techniques, and design alignment, you can achieve professional-looking results. Proper hooping, stabilizing, and centering are key to precise embroidery. Avoid common mistakes like incorrect sizing or misalignment, and consider specific garment types for optimal placement. Whether embroidering on shirts, hats, or bags, attention to detail ensures your designs stand out. Practice and patience will help you refine your skills, leading to stunning embroidery every time. For further learning, explore additional resources and guides to deepen your expertise in embroidery placement. To further refine your embroidery placement skills, explore online tutorials and guides that offer step-by-step instructions. Join embroidery communities and forums where experts share tips and tricks. Invest in books or e-books dedicated to embroidery techniques, as they often include detailed sections on placement. Utilize YouTube channels and embroidery blogs for visual demonstrations of various methods. Additionally, consider enrolling in embroidery classes or workshops to gain hands-on experience. Stabilizing tools, such as embroidery hoops and stabilizing materials, are essential for precise placement. Experiment with embroidery software to visualize designs before stitching. Practice regularly to build confidence and mastery. By combining these resources with patience and creativity, you’ll achieve professional-quality embroidery placement in no time.Measuring and Marking Techniques
Choosing the Right Design Size for Your Garment
Embroidery Placement by Garment Type
Placement on Shirts and Tops
Placement on Hats and Caps
Placement on Bags and Accessories
Hooping and Stabilizing for Precise Embroidery
Centering Designs on Fabric
Aligning Designs with Seams or Pockets
Avoiding Common Mistakes in Embroidery Placement

Tips for Specific Embroidery Placements
Placing Designs on Sleeves
Placing Designs on Collars
Additional Resources for Mastering Embroidery Placement